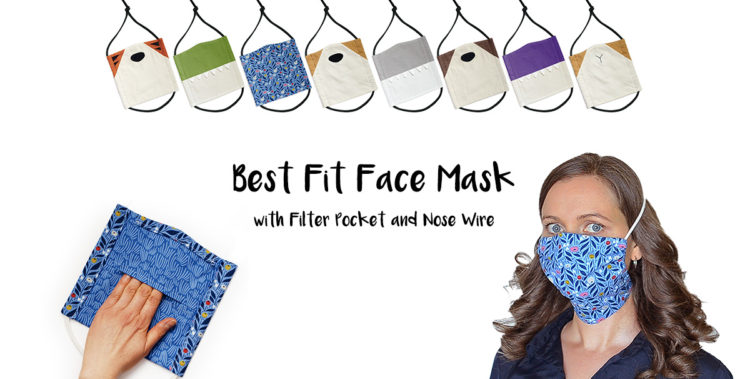
Easy to Sew Face Masks with Removable Nose Wire and Filter Pocket – Corgi, Tiger, Otter, Dino, Cat, Shark, Hamster, Dragon
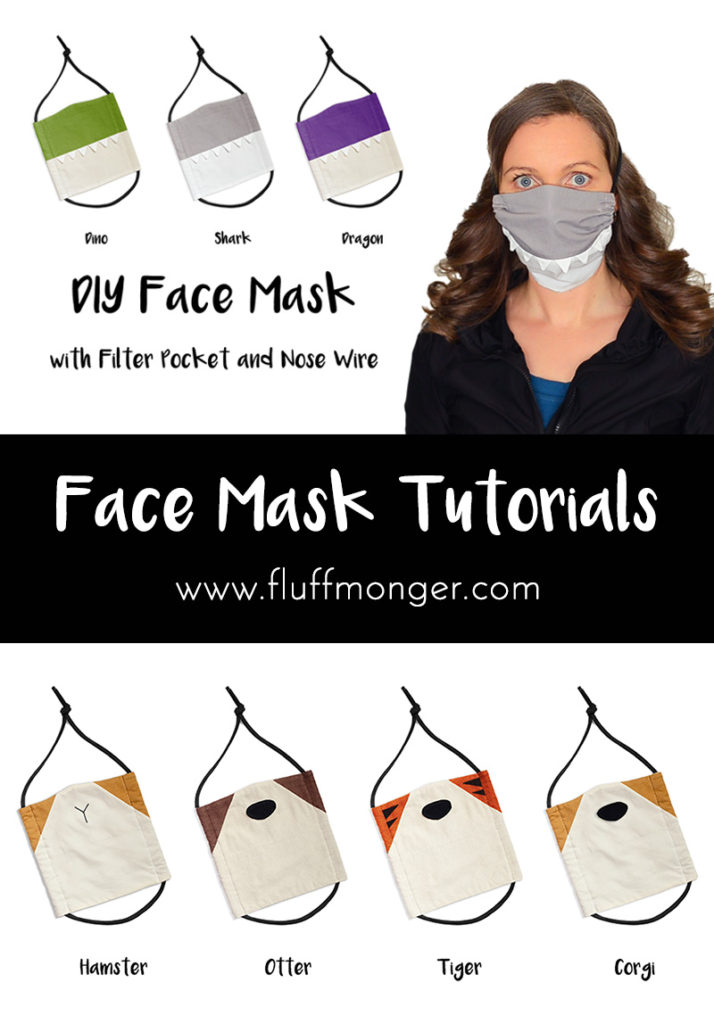
On April 20, 2020 by fluffmongerOver the past few weeks, I’ve tried out a number of different face mask patterns from pleated to fitted and found that a lot of patterns smushed my nose down and left open areas on the top, sides, and bottom for air to flow freely in and out. The easiest to sew pattern with the best fit for me was Homemade on our Homestead’s pattern. When tied properly to the back of the head and cinched tight, the mask makes a nice seal around the chin and sides of the face that I was unable to achieve with pleated or fitted mask patterns. I’ve added a few adjustments to the pattern including a curved top to contour the nose and under the eyes, and I added a wire pocket for a removable nose wire. I also made animal versions of the pattern in adult and child sizes to make wearing a mask fun!
Please note that homemade masks are not a replacement for medical protective equipment. If you make masks to sell or donate, you should not make claims that your masks will protect against COVID-19/Coronavirus.
Materials
You’ll need:
- 100% cotton fabric for liner and nose strip (tight-weave cotton or quilting cotton) washed and dried
- 100% cotton fabric for front of mask (can be quilting cotton or t-shirt fabric)
- All-purpose thread (I carry organic thread in my Etsy shop)
- Marking tool (like this disappearing pen* or this water soluble pen*)
- Scissors
- Pins or clips
- Tool for turning and stuffing (like these hemostat clamps)
- Iron
- Floral wire, pipe cleaners, folder fasteners, or around #20 gauge wire
- 50″ of t-shirt yarn (see this tutorial for making t-shirt yarn), synthetic cotton 3/16″ clothesline cut to 50-60”, or shoelaces
Links with an asterisk (*) are affiliate links. If you make a purchase through one of them, I get a small percentage of the sale with no extra cost to you.
Printing the Patterns
Select the pattern(s) you’d like to print after following the link to download the patterns. The patterns come in both adult and child size, and there are different patterns for sewing a plain mask, a dino/shark/dragon mask, and a corgi/otter/tiger/hamster mask. The child size is based off the child size pattern by Homemade on Our Homestead. I do not have any children, so I haven’t been able to do a proper in-person fitting for children while in quarantine. I’ve sewn a few patterns for children ages 7-12 that have been picked up or dropped, and the child size pattern seems to fit well based on the photos I’ve received. For small children, you may want to trim some off the edges of the pattern for a better fit. According to the CDC, children under the age of two and those with trouble breathing should not wear a mask.
These patterns are free. It is not required to sign up for my newsletter to get the patterns. If you are having issues downloading the pattern, please try a different internet browser as some browsers display the page differently.
Print pattern at 100%. (See a tutorial on printing and assembling patterns here.)
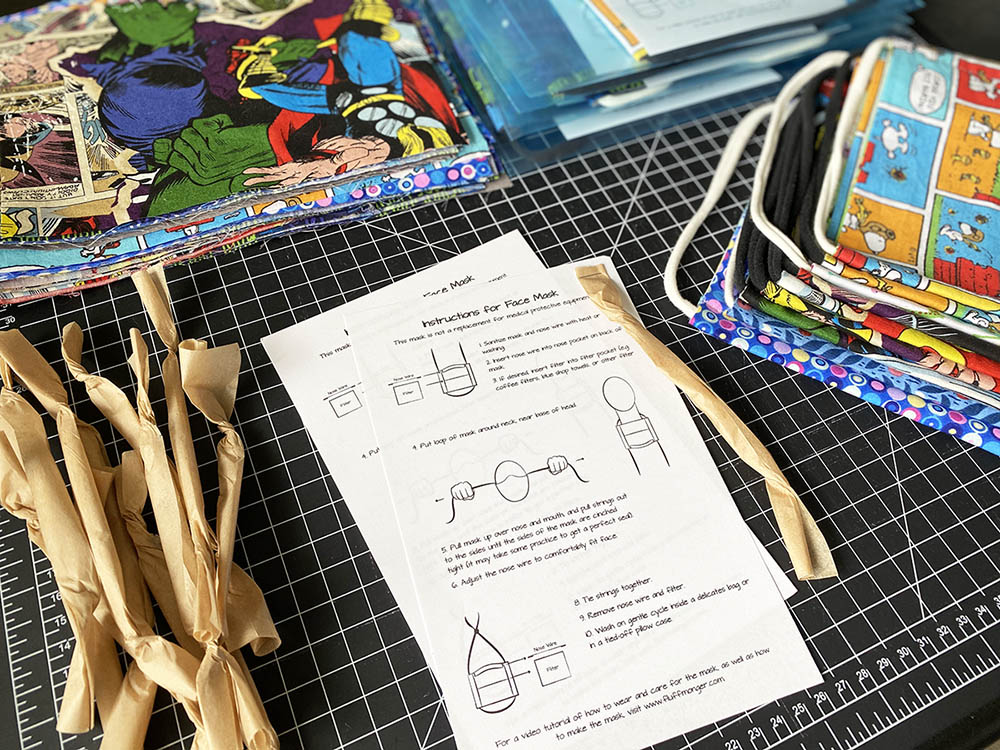
UPDATE 4/30/20: If you are making masks to donate and would like a printable instruction sheet to put with your masks, there is a downloadable PDF info sheet available here.
Instructions for Plain Mask (See Animal Mask Videos Below)
Cutting the Fabric
Whether you are making a plain mask or an animal mask, all steps are the same except for making the mask front. The steps directly below are for a plain front mask. If you want to make an animal mask, scroll down for corgi/tiger/otter/hamster mask instructions or shark/dino/dragon mask instructions.
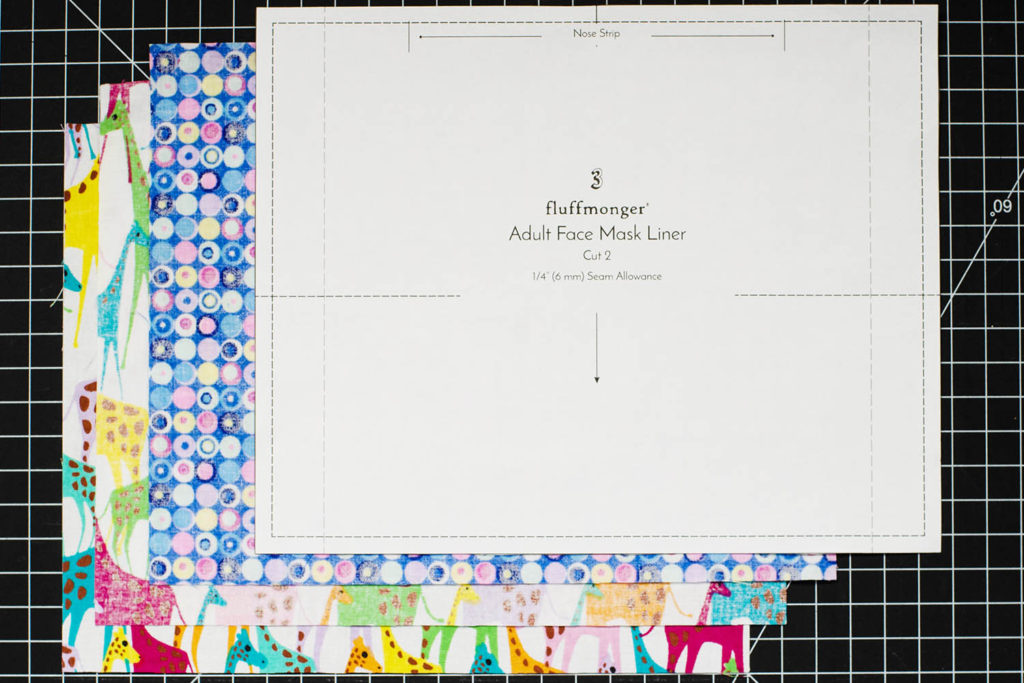
- Trace the Adult or Child Face Mask Liner pattern piece twice on your liner fabric and trace the Mask Front pattern piece once on the main fabric for the outside of the mask and cut out.
Making the Nose Strip
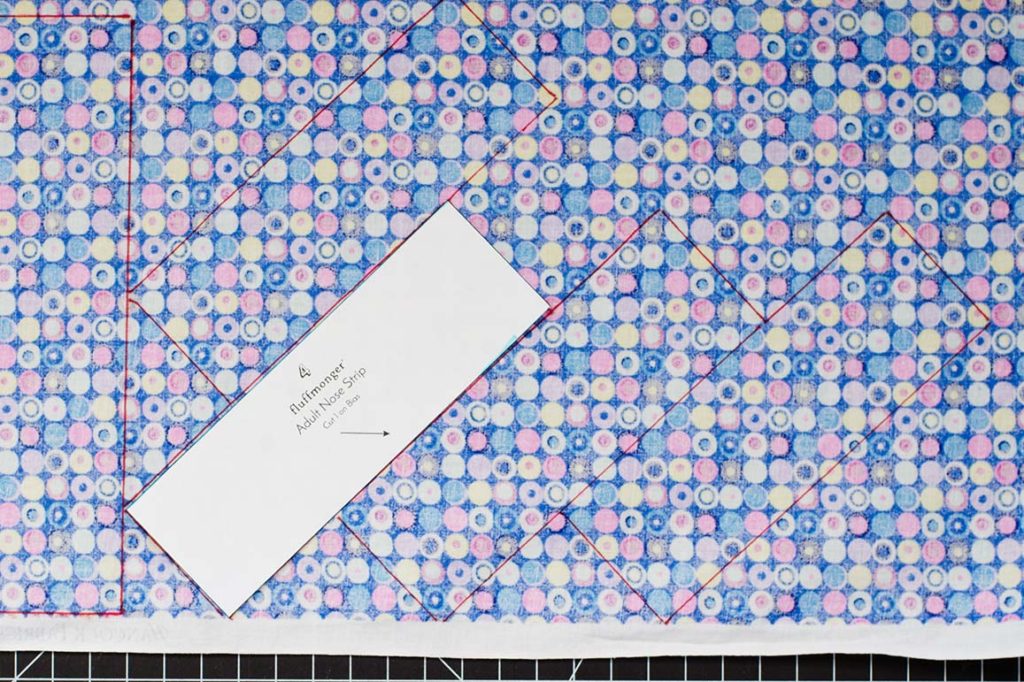
- Trace the nose strip at a 45 degree angle to the selvedge edge.
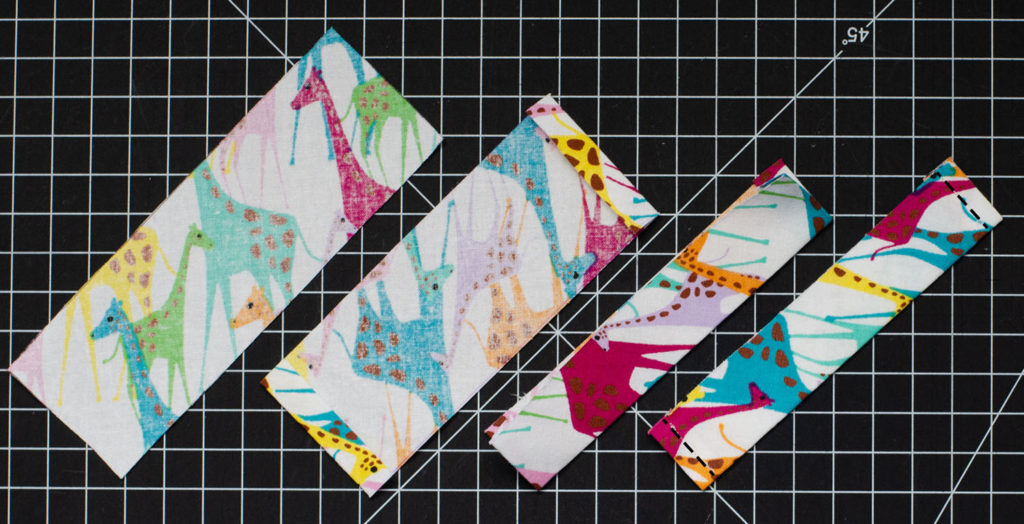
- Cut bias strip
- Fold sides in 1/4″ (6mm)
- Fold in half lengthwise
- Stitch ends
Making the filter pocket (liner pieces)

- Mark the 3″ (7.6 cm) stitch lines indicated on the Mask Liner pattern piece.
- With right sides together, stitch the liner pieces together along the marked lines.
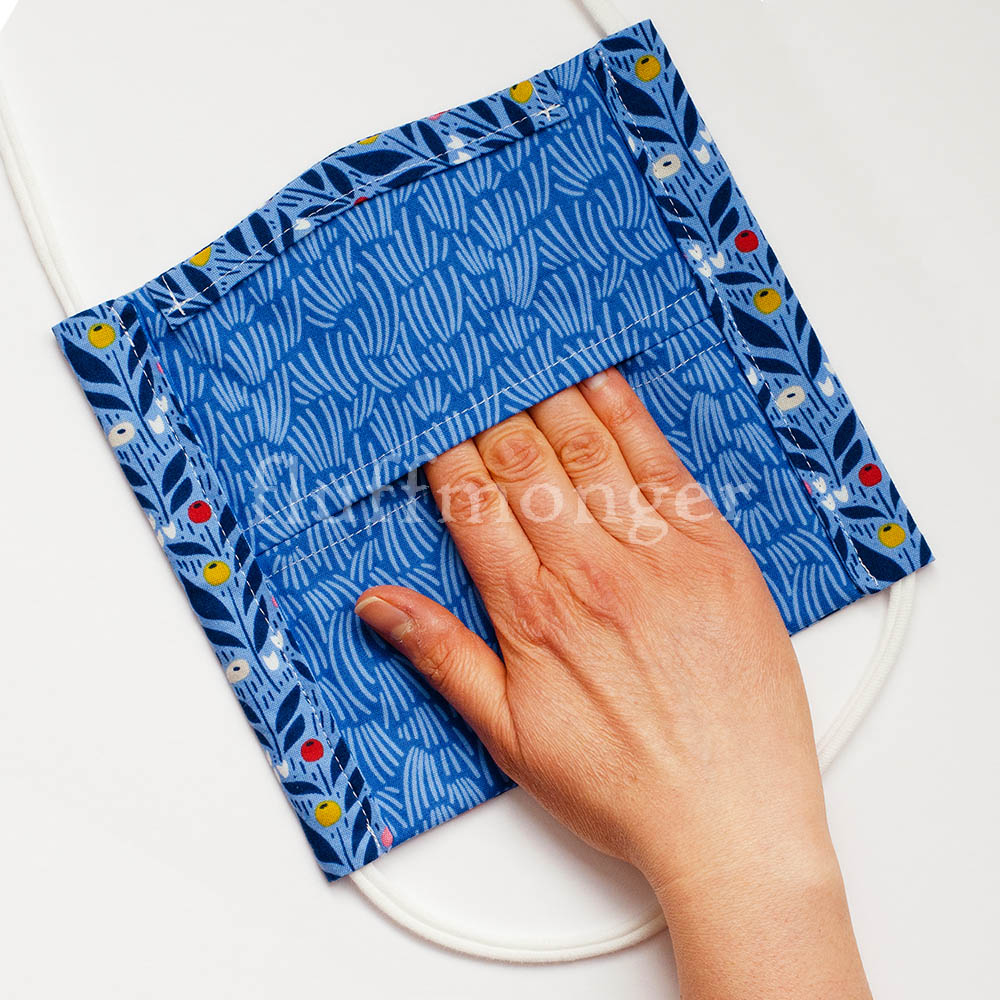
- Fold liner pieces open so right sides are facing out. Press. If you have difficulty with this part, check out the tutorial video 6 minutes in.
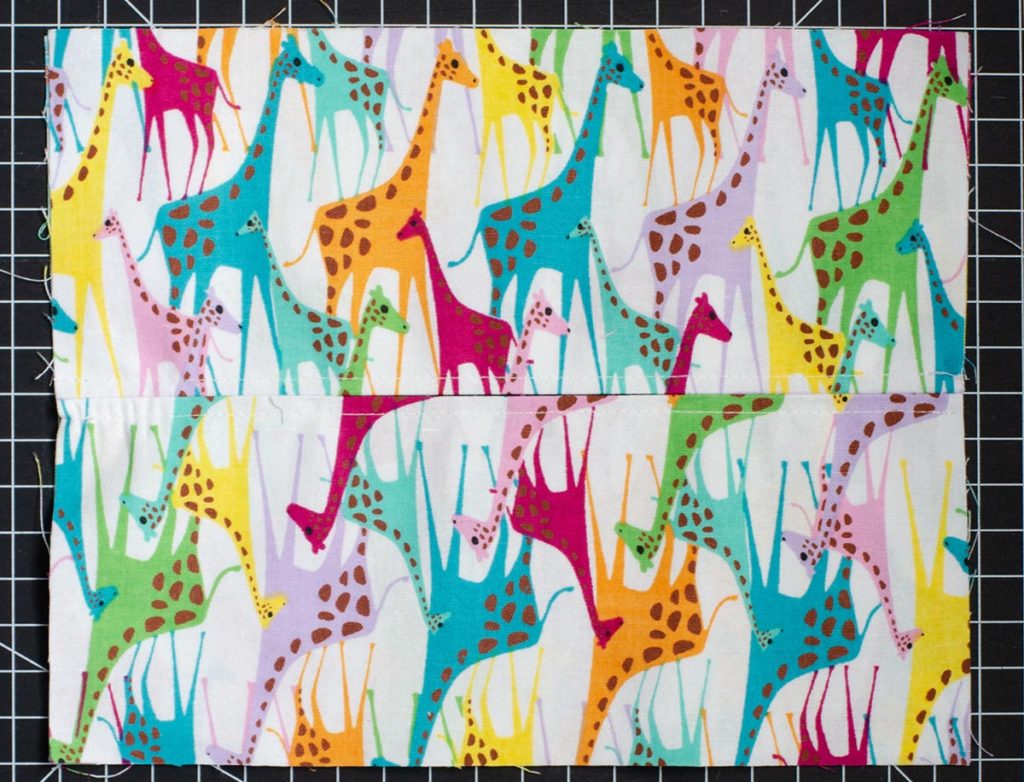
- Top stitch the filter pocket (optional)
Cutting Curve for top of mask

- Place liner pieces (filter pocket) and front piece right sides together.
- Trace the cut line (and stitch line if preferred) for the curve of the nose using the tracing template. Be sure to mark the center notch.
- Cut all pieces along the curved cut line.
Attaching nose strip to mask

- Pin nose strip to curve of filter pocket (liner).
- Topstitch nose strip across top and bottom (leave sides open for inserting and removing nose wire).
- Place filter pocket (liner) with the side with the nose strip face down against the front piece of the mask. Pin and stitch 1/4″ (6mm) from edge all the way around the mask. (Optional) use a narrow zig-zag stitch around outside of straight stitch.
Flipping mask and folding in sides

- After stitching around mask, clip corners.
- Flip right side out and press. Fold sides in 3/4″ (18mm) as indicated on pattern pieces.
- (Back View)
Attaching cord to mask
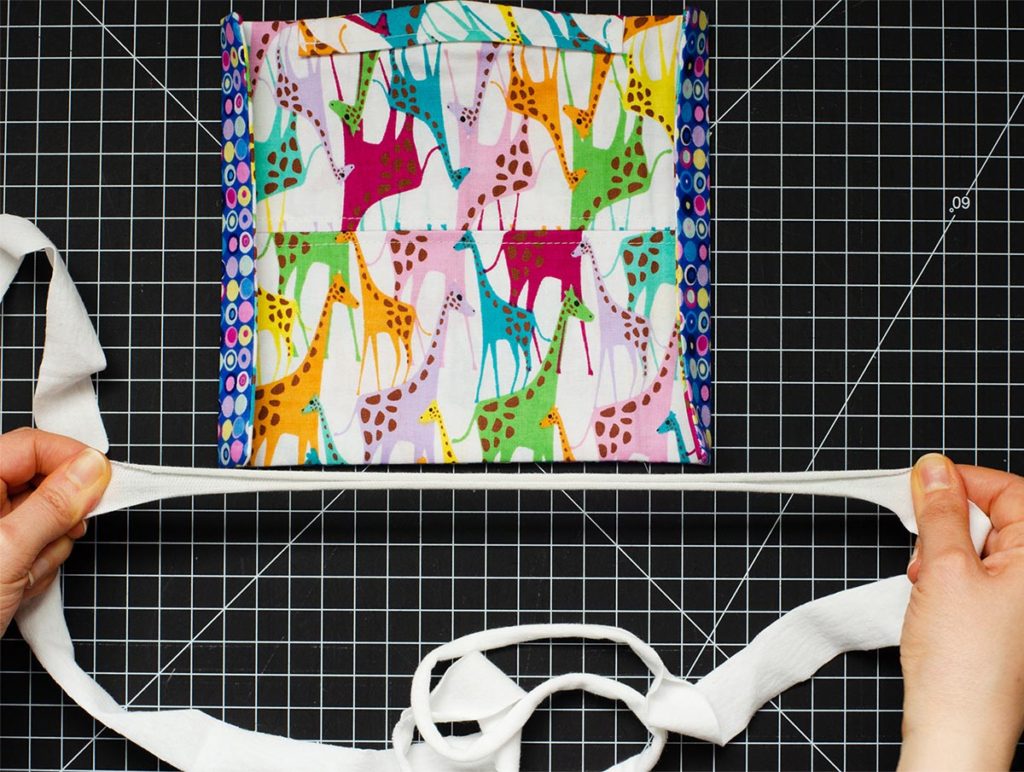
- Cut 50″ (127 cm) of t-shirt yarn or 50-60″ (127-152 cm) of closeline, shoelaces, or other cord of choice. If you don’t know how to make t-shirt yarn, check out this tutorial for making t shirt yarn by Craft Passion.
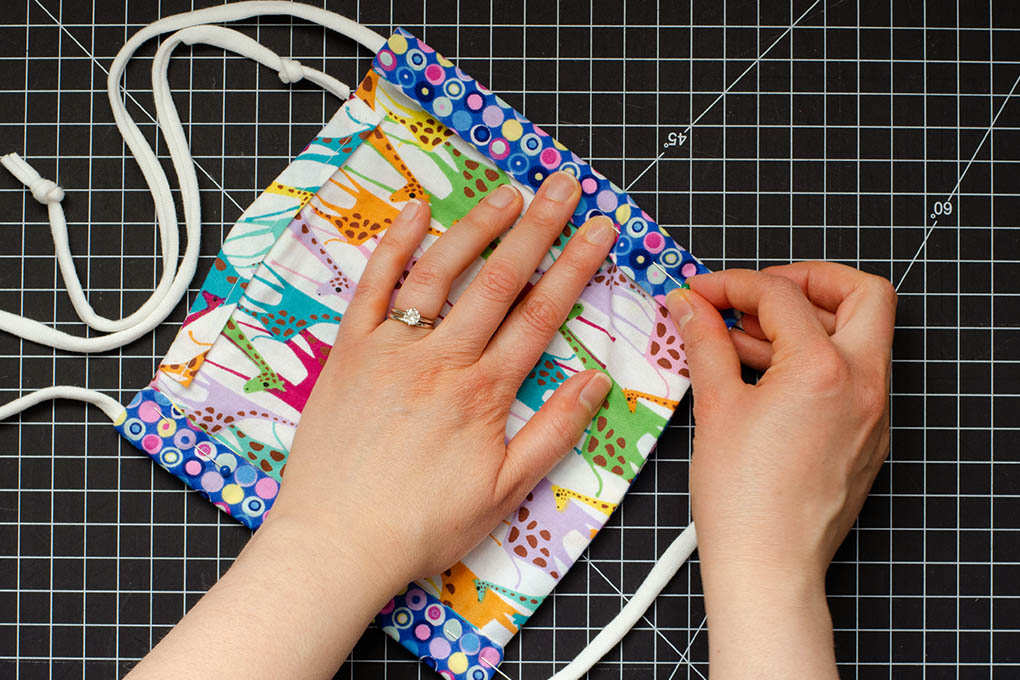
- With cord folded in half, cord loop at bottom of mask, and cord ends at top of mask, pin cord inside folded sides.
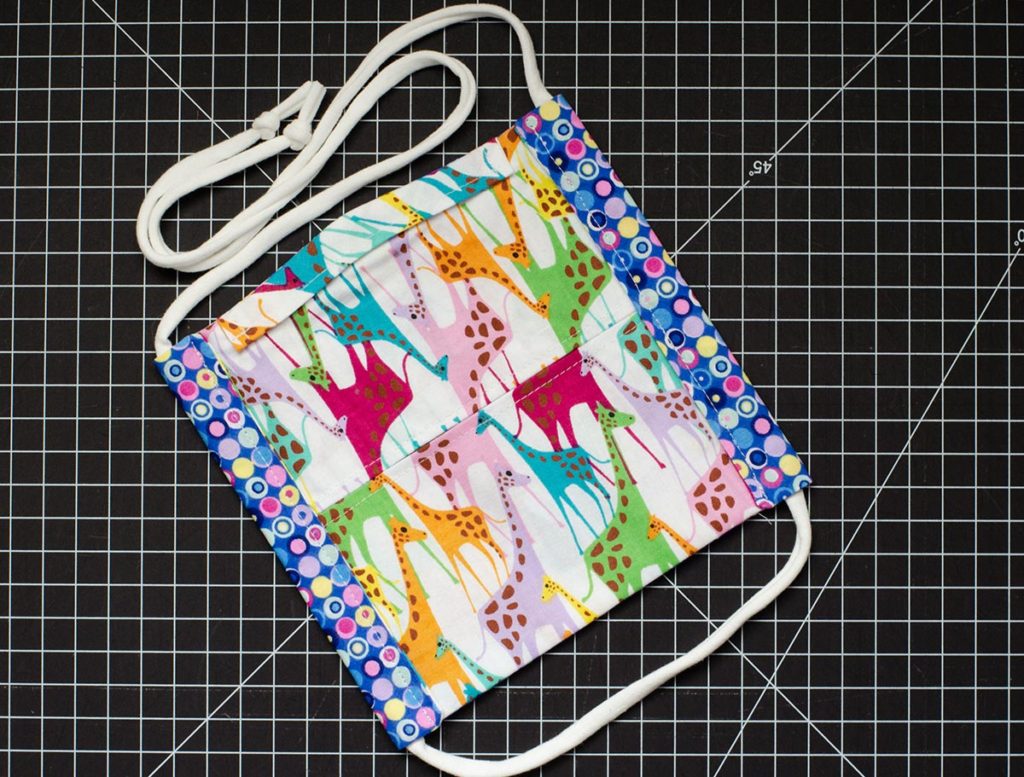
- Topstitch sides down 1/4″ (6mm) from inside edge. Be sure to forward and back stitch multiple times at beginning and end to ensure cord will remain secure after multiple uses.
Making nose wire
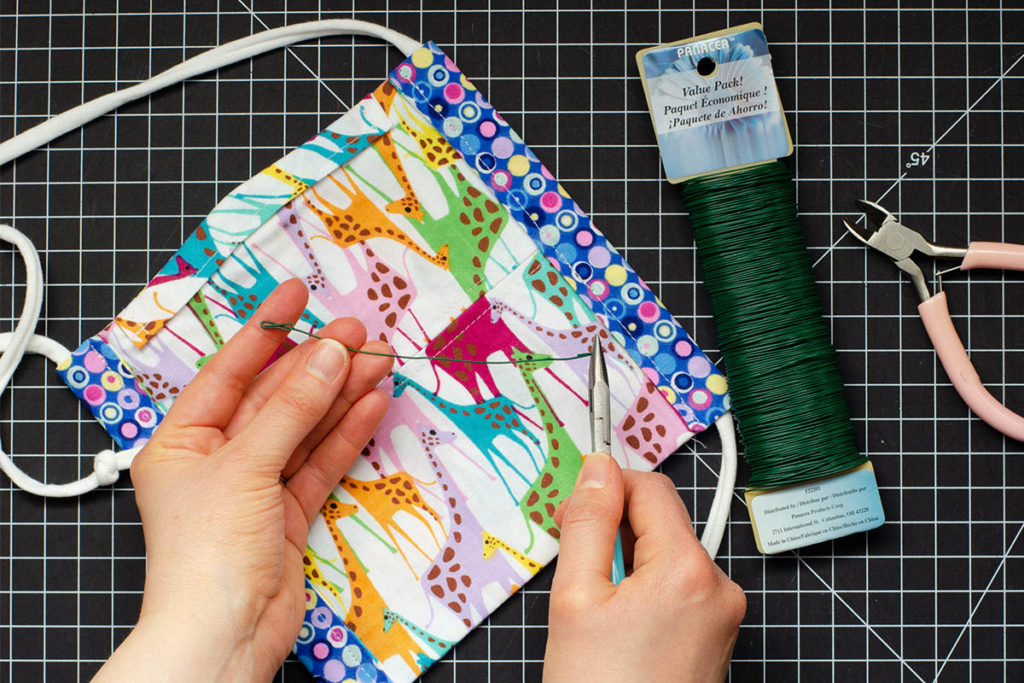
- While wearing eye protection, cut 6″ (15 cm) of floral wire or around #20 gauge wire. Fold ends in with pliers once or twice so nose wire can slide in and out of nose pocket without snagging. (Be sure to remove this wire when laundering.)
Instructions for Corgi/Otter/Tiger/Hamster Mask

Cutting the fabric for mask front
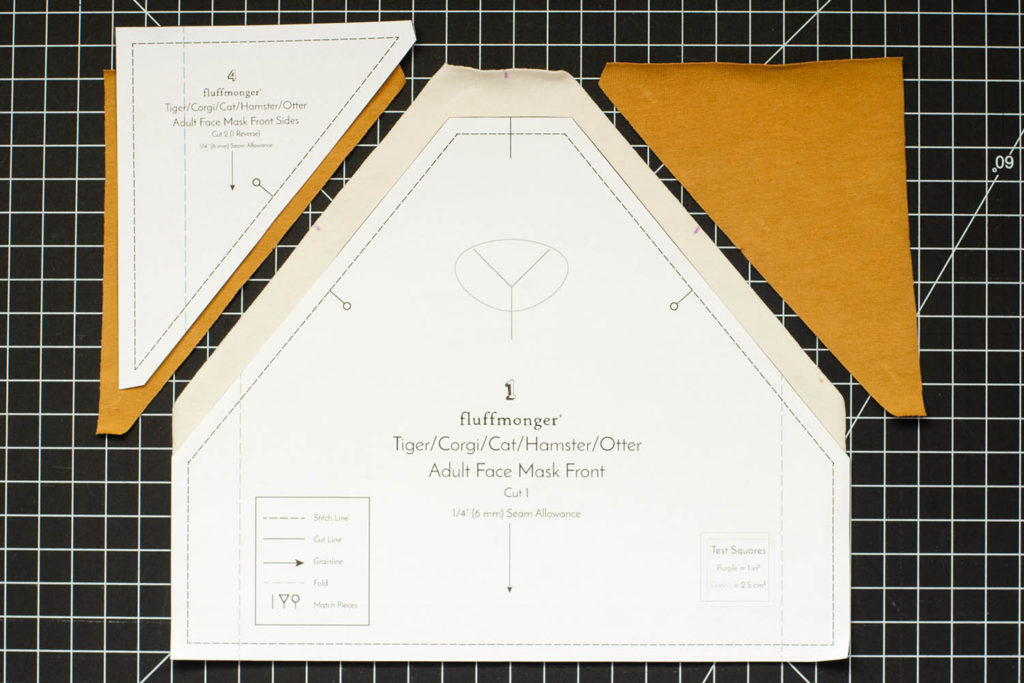
- Trace Adult or Child Tiger/Corgi/Otter/Hamster Mask front once on main color fabric.
- Trace Adult or Child Tiger/Corgi/Otter/Hamster Front Sides twice (one reversed) on secondary color fabric.
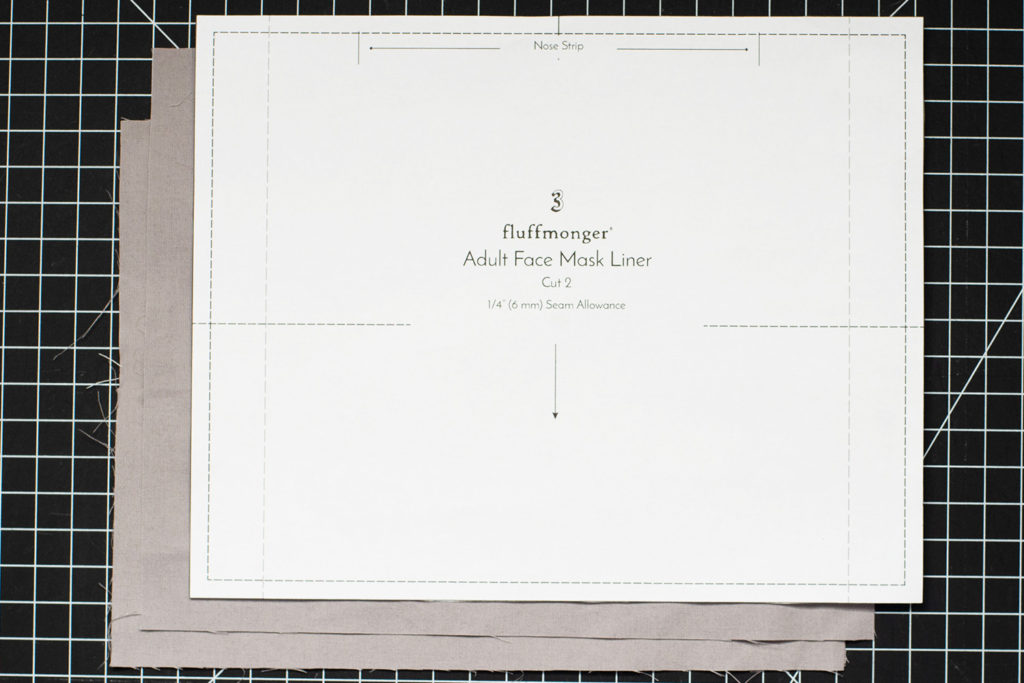
- Trace the Adult or Child Face Mask Liner pattern piece twice on your liner fabric and cut out.
Making the Nose Strip

- Trace the nose strip at a 45 degree angle to the selvedge edge.

- Cut bias strip
- Fold sides in 1/4″ (6mm)
- Fold in half lengthwise
- Stitch ends
Making the filter pocket

- Mark the 3″ (7.6 cm) stitch lines indicated on the mask liner pattern piece.
- With right sides together, stitch the liner pieces together along the marked lines.
- Fold liner pieces open so right sides are facing out. Press. If you have difficulty with this part, check out the tutorial video 6 minutes in.

- Top stitch the filter pocket (optional)
Making the nose
Depending on which animal you are making, you may or may not need a nose. If you are making a hamster, you can embroider along the Y-shape on the front pattern piece. The instructions below are for a sewn nose. If you prefer to make an applique nose (and tiger stripes), check out this applique tutorial by Shiny Happy World.

- Trace the nose on folded/layered fabric with right sides together. You can use woven or knit fabric (I’m using t-shirt fabric). I’ve found that white artist pens and white gel pens work well for tracing on black fabric. You can also use chalk or another marking tool made for dark fabrics. (If you do not like this method for making the nose, check out one of these applique tutorials from Shiny Happy World.)
- Stitch the traced line on folded/layered fabric. Use a smaller stitch length to ensure you get all the details of the curves. If using woven fabric, use a straight stitch. If using stretch fabric, use a ballpoint needle and either a stretch stitch or a straight stitch with a narrow zig-zag stitch around the edge.
- Cut a small hole for turning on the back of the nose. Flip right side out and press.
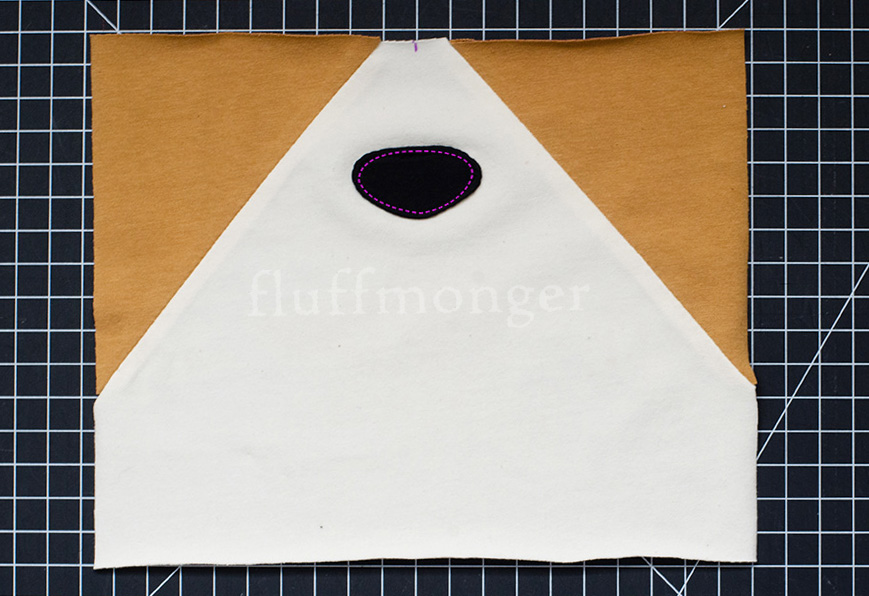
- Topstitch the nose to front of mask.
- (Optional) If making a tiger, go ahead and add your stripes. I recommend using an applique method. Check out one of these applique tutorials from Shiny Happy World.
Cutting curve for top of mask

- Place liner pieces (filter pocket) and front piece right sides together.
- Trace the cut line (and stitch line if preferred) for the curve of the nose using the tracing template. Be sure to mark the center notch.
- Cut all pieces along the curved cut line.
Attaching nose strip to mask

- Pin nose strip to curve of filter pocket (liner).
- Topstitch nose strip across top and bottom (leave sides open for inserting and removing nose wire).
- Place filter pocket (liner) with the side with the nose strip face down against the front piece of the mask. Pin and stitch 1/4″ (6mm) from edge all the way around the mask. (Optional) use a narrow zig-zag stitch around outside edge of straight stitch.
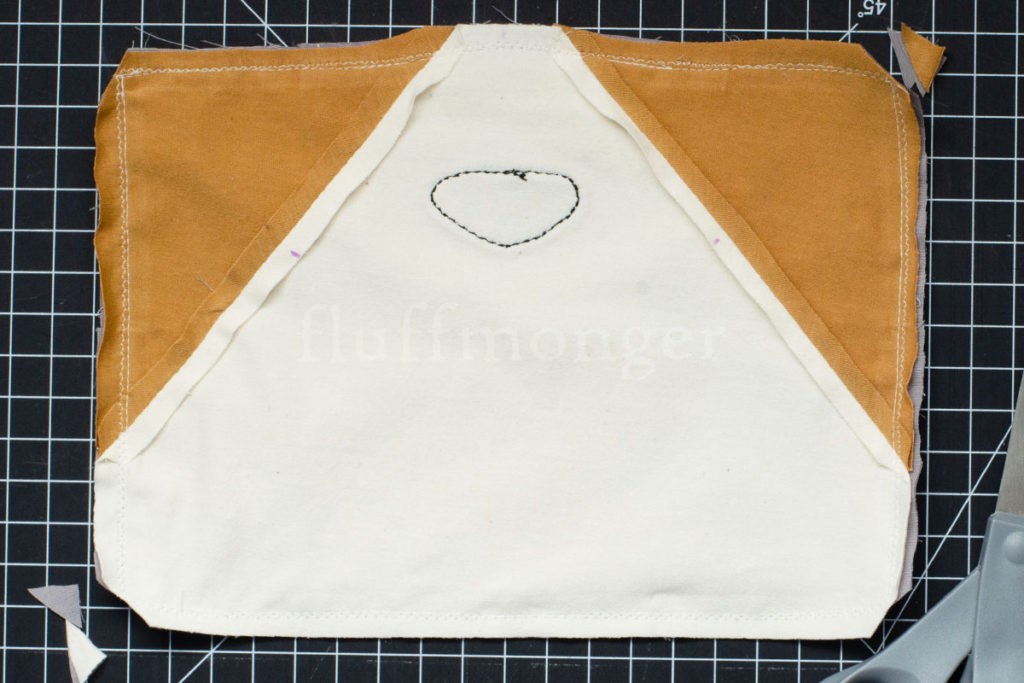
- After stitching around mask, clip corners.
Flipping mask and attaching cord

- Flip right side out and press. Fold sides in 3/4″ (18mm) as indicated on pattern pieces.
- Cut 50″ (127 cm) of t-shirt yarn or 50-60″ (127-152 cm) of closeline, shoelaces, or other cord of choice. If you don’t know how to make t-shirt yarn, check out this tutorial for making t shirt yarn by Craft Passion.
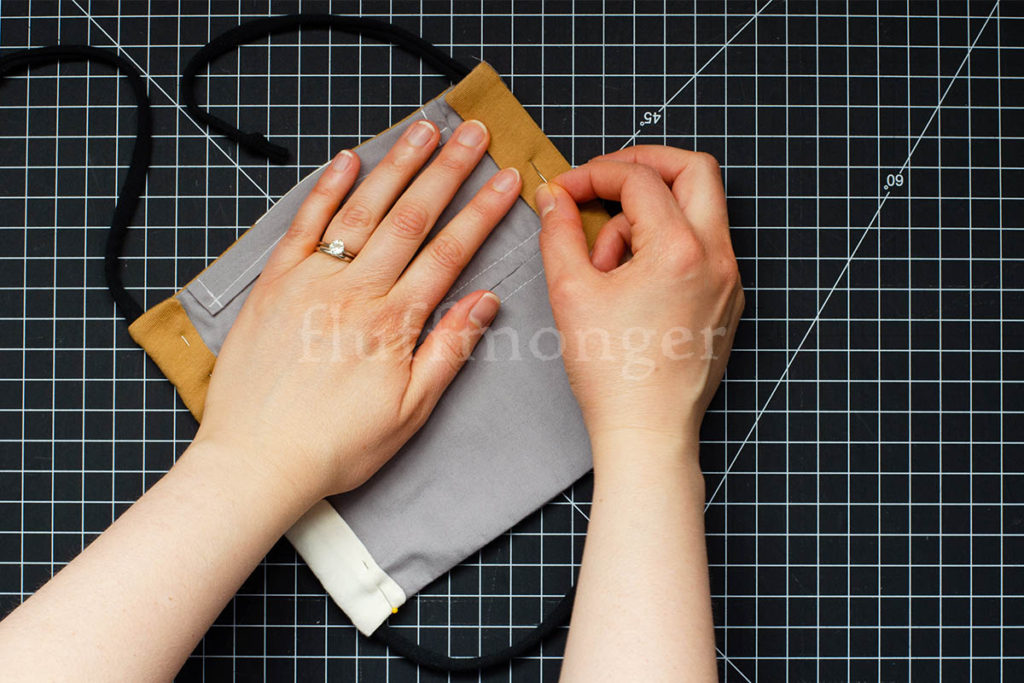
- With cord folded in half, cord loop at bottom of mask, and cord ends at top of mask, pin cord inside folded sides.

- Topstitch sides down 1/4″ (6mm) from inside edge. Be sure to forward and back stitch multiple times at beginning and end to ensure cord will remain secure after multiple uses.
Instructions for Shark/Dino/Dragon Mask

Cutting the fabric for mask front
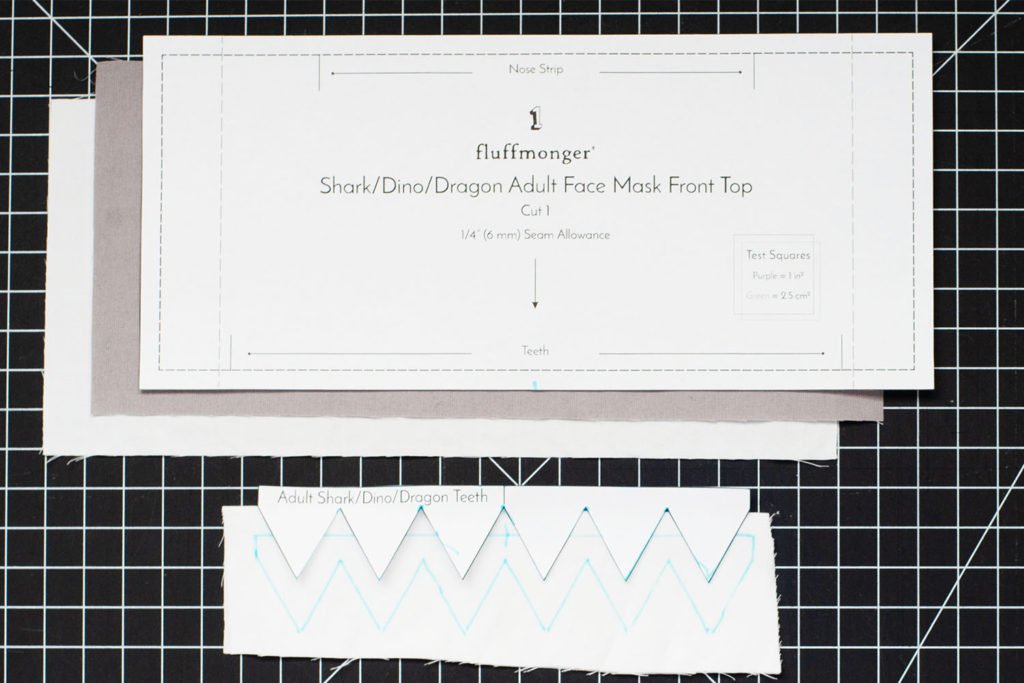
- Trace 1 Mask Front Top and 1 Mask Front Bottom onto your colors of choice for a shark, dinosaur, or dragon.
- Trace the teeth on folded/layered white fabric.

- Trace the Adult or Child Face Mask Liner pattern piece twice on liner fabric and cut out.
Making the Nose Strip

- Trace the nose strip at a 45 degree angle to the selvedge edge.

- Cut bias strip
- Fold sides in 1/4″ (6mm)
- Fold in half lengthwise
- Stitch ends
Making the filter pocket

- Mark the 3″ (7.6 cm) stitch lines indicated on the mask liner pattern piece.
- With right sides together, stitch the liner pieces together along the marked lines.
- Fold liner pieces open so right sides are facing out. Press. If you have difficulty with this part, check out the tutorial video 6 minutes in.

- Top stitch the filter pocket (optional)
Making the teeth

- Using a shorter stitch length, stitch along traced line for teeth, leaving the top straight edge open. (See video above for detailed instructions on how to make the points sharp.)
- Trim seam allowance to 3/16″ (4.7 mm) and clip corners and curves.
- Flip teeth right side out. Use hemostat clamps or a chop stick to gently push out points of teeth. Press.
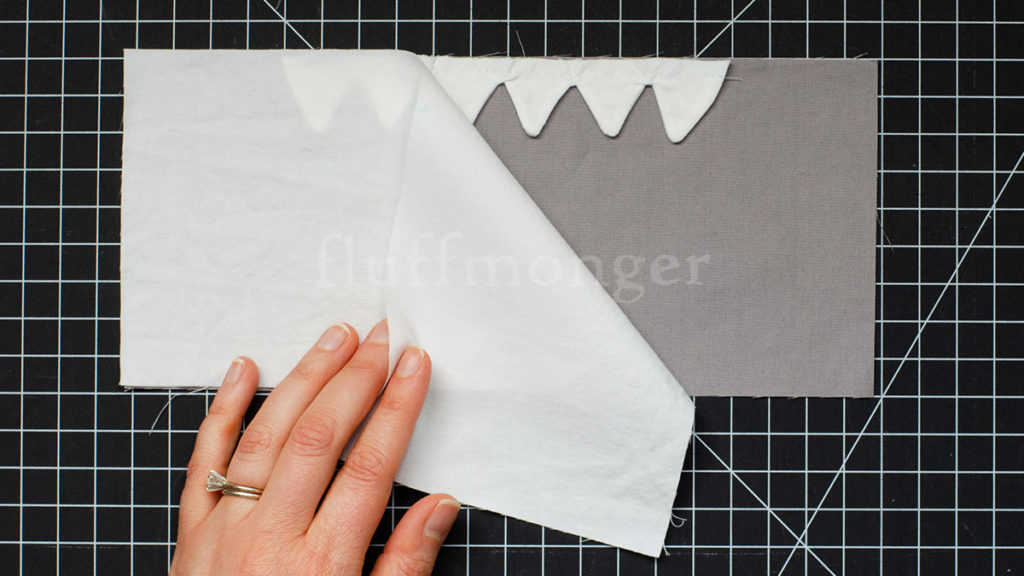
- Sandwich teeth between Face Mask front Top and Face Mask Front Bottom. Baste stitch to ensure teeth are straight, then stitch again using a forward and back stitch at the ends,
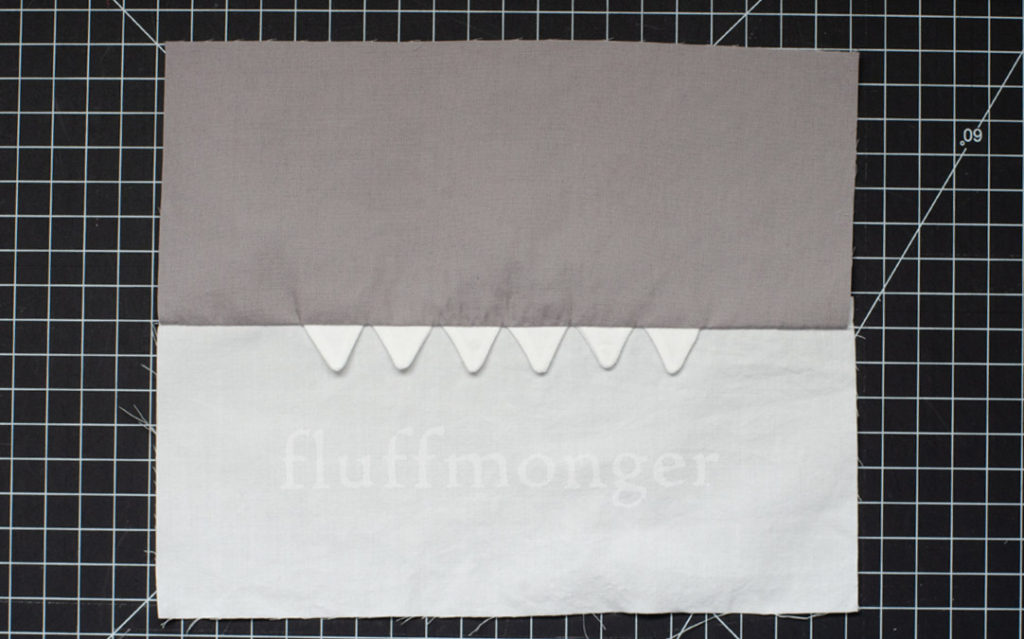
- Press open with teeth facing down.
Attaching nose strip to mask

- Pin nose strip to curve of filter pocket (liner).
- Topstitch nose strip across top and bottom (leave sides open for inserting and removing nose wire).
- Place filter pocket (liner) with the side with the nose strip face down against the front piece of the mask. Pin and stitch 1/4″ (6mm) from edge all the way around the mask.

- After stitching around mask, clip corners.
Flipping mask and attaching cord

- Flip right side out and press. Fold sides in 3/4″ (18mm) as indicated on pattern pieces.
- Cut 50″ (127 cm) of t-shirt yarn or 50-60″ (127-152 cm) of closeline, shoelaces, or other cord of choice. If you don’t know how to make t-shirt yarn, check out this tutorial for making t shirt yarn by Craft Passion.

- With cord folded in half, cord loop at bottom of mask, and cord ends at top of mask, pin cord inside folded sides.

- Topstitch sides down 1/4″ (6mm) from inside edge. Be sure to forward and back stitch multiple times at beginning and end to ensure cord will remain secure after multiple uses.
Share Your Creations!
I’d love to see what you make with this pattern! Post your photos in my Fluffmonger Patterns group on Facebook!
If you’re interested in sewing more than just face masks, check out my plush sewing tutorials! If you’ve never sewn a plush toy before, check out this full-length video tutorial on how to sew a plush otter. It will take you through all the skills you need to sew a plush toy.
Selling or Donating Items Made with this Pattern
Please note that homemade masks are not a replacement for medical protective equipment. If you make masks to sell or donate, you cannot make claims that your masks will protect against COVID-19/Coronavirus.
If you make animal masks using this pattern to sell, please give credit to Fluffmonger with “pattern by Fluffmonger” and a link to my website www.fluffmonger.com on your tags and listings.
This design is protected by federal copyright law (© 2020) and may not be reproduced in any form. Reproduction of this design, either in part or whole, or distribution of this pattern electronically or by hard copy is strictly prohibited.
33 comments
Leave a Reply Cancel reply
Archives
- March 2021
- February 2021
- April 2020
- January 2020
- November 2018
- July 2018
- April 2018
- March 2018
- February 2018
- January 2018
- December 2017
- November 2017
- October 2017
- March 2017
- February 2017
- November 2016
- October 2016
- September 2016
- August 2016
- July 2016
- June 2016
- March 2016
- February 2016
- January 2016
- December 2015
- November 2015
Calendar
| S | M | T | W | T | F | S |
|---|---|---|---|---|---|---|
| 1 | 2 | 3 | 4 | |||
| 5 | 6 | 7 | 8 | 9 | 10 | 11 |
| 12 | 13 | 14 | 15 | 16 | 17 | 18 |
| 19 | 20 | 21 | 22 | 23 | 24 | 25 |
| 26 | 27 | 28 | 29 | 30 | ||



By chance do you sell these masks? As a family of 4 I would love to get a few for my family. Especially the animal ones for my daughters. They are all super cute patterns and I love all the details you added to your design and I especially like that you provided templates but I am not a crafty person nor do I have a sewing machine. Thank you.
Hi, Aurora! Thank you for your kind words! Unfortunately, I am not selling any. The masks I have been making are being donated to a specific organization in my home town. If you like, feel free to post in my Fluffmonger Patterns group on facebook that you are looking for someone to make you masks using my pattern for you to purchase. I don’t know the members of my group personally, but they should be able to provide examples of their work for you to decide if you want to buy from them (some even have Etsy shops). I hope that helps! Stay safe and well!
I luv, luv, luv this pattern, video, etc. Please can you add the link for fabric used. I like your selection fabrics and need a source other than my Joann’s – Because of the demand my fabric orders of the nicer prints keep getting canceled. Thank you
These look great. I will have to try them. Esp like animals ones since I am a Vet Tech
Thank you! I bet they will be much appreciated at your work then! I hope you enjoy the patterns!
I cannot get the pattern link to download…I am not a novice using computers and online .pdf downloads…What am I missing here?
If you’ve been able to get to the Free Pattern Library and click on the link to download, be sure to check your downloads folder on your computer. It will be in a zip file, so you’ll have to click on the folder to “unzip it” and access the files. https://fluffmonger.net/fluffmonger-free-pattern-library/
Good Morning. I keep clicking on the download link for the pattern, but nothing happens.
If you’ve been able to get to the Free Pattern Library and click on the link to download, be sure to check your downloads folder on your computer. It will be in a zip file, so you’ll have to click on the folder to “unzip it” and access the files. https://fluffmonger.net/fluffmonger-free-pattern-library/
I cant wait to try this for my grandkids. Can you use elastic instead of the tie?
Kathy, do you mean using elastic instead of cord? you won’t be able to cinch the mask without the tension of the cord. If you want to gather the fabric by stretching the elastic and stitching it to the mask, you can try that to see if it works, but I would recommend cord or t-shirt fabric if you have it.
I don’t have a printer. Could you possibly give the measurements of the pattern. Thank you.
I can give the dimensions of the mask pieces, but it won’t include the nose curve that is included in the pattern. The Adult mask pieces are 10″ by 8″, and the child mask pieces are 9″ by 7″.
I found some attractive and some cute fabric at Makers Mercantile online.
This is a great design, and it’s exactly what I was looking for: a mask with a wire loop (and the wire can be removed) and a filter pocket!. The t-shirt yarn is a revelation! For me, the mask fits better with t-shirt yarn than with a soft, stretchy shoelace. The mask was pretty easy to make even for a novice. Thank you very much!
I’m so glad you like the pattern and it worked out for you! I agree that t-shirt yarn works the best!
What is the safest way to remove the mask while avoiding touching the front of it.
Hi, Linda! If you use t-shirt yarn for the cord, it has stretch to it. Without untying it from the back of your head, you can just stretch the cord and pop it off your head.
I would love two buy two of those a dog one for my daughter & any one for myself.
Help!!! I can’t get the pattern to download. I want to make the plain front. I like the curve at the top. Hope you can help me get the pattern. The ks
I’m sorry you’ve been experiencing difficulty getting the pattern. The internet browser you are using might be presenting the web page in an odd way. If you can, try opening the web page in a different browser (e.g. chrome, safari, etc.). If you’ve been able to get to the Free Pattern Library and click on the link to download, be sure to check your downloads folder on your computer. It will be in a zip file, so you’ll have to click on the folder to “unzip it” and access the files. https://fluffmonger.net/fluffmonger-free-pattern-library/
I have no T-Shirts to cut up so I might go with the shoe lace idea. My niece will going to college where the mascot is a Tiger. I will be making her one of the tiger masks to take to school, if it happens. Her school is hoping to open in the Fall.
That’s so sweet of you to make her a tiger mask! I hope she has a great school year!
love these ideas! also if you flip the tie, with the mask loop at the top and the tie at the bottom, you can wear it without disturbing your hair. The top loop goes over your ears, under your hair and lays just under your hair line. The bottom tie is tied lower, about the middle of your back neck.
These are excellent! Thank you!
thank you for the pattern! Is it possible to make this using over the ear elastic instead of tshirt yarn for ties? Thank you!
Hi, Heather! You can adjust the pattern to use elastic if you like. You would need to stitch the ends of the elastic to the mask instead of feeding them through the channel made for the t-shirt yarn.