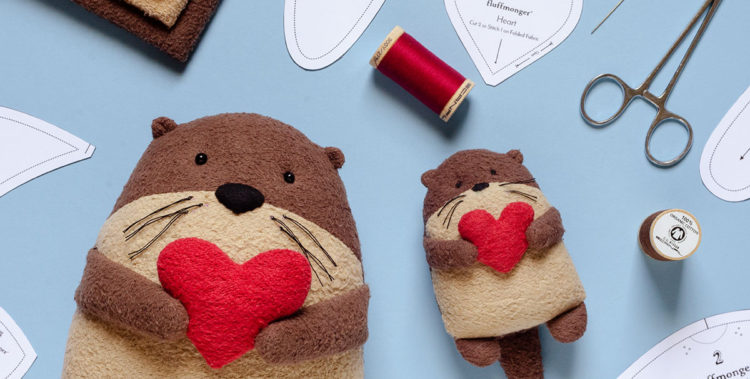
Squeakers the Otter Free Sewing Pattern and Tutorial
On July 30, 2018 by fluffmongerIt’s Sew a Softie month, and I’m excited to join over two dozen bloggers posting free, easy-to-sew softie tutorials this month! The Sew a Softie event was created by Trixi Symonds of Coloured Buttons in 2016 as an initiative to encourage those with little to no sewing experience to attempt a fun and simple sewing project! July may be coming to a close, but the fun is nowhere near over! Today, I’m sharing a tutorial for one of my favorite animals—the otter! And tomorrow, Stephanie of Swoodson Says will be posting the last tutorial of July!
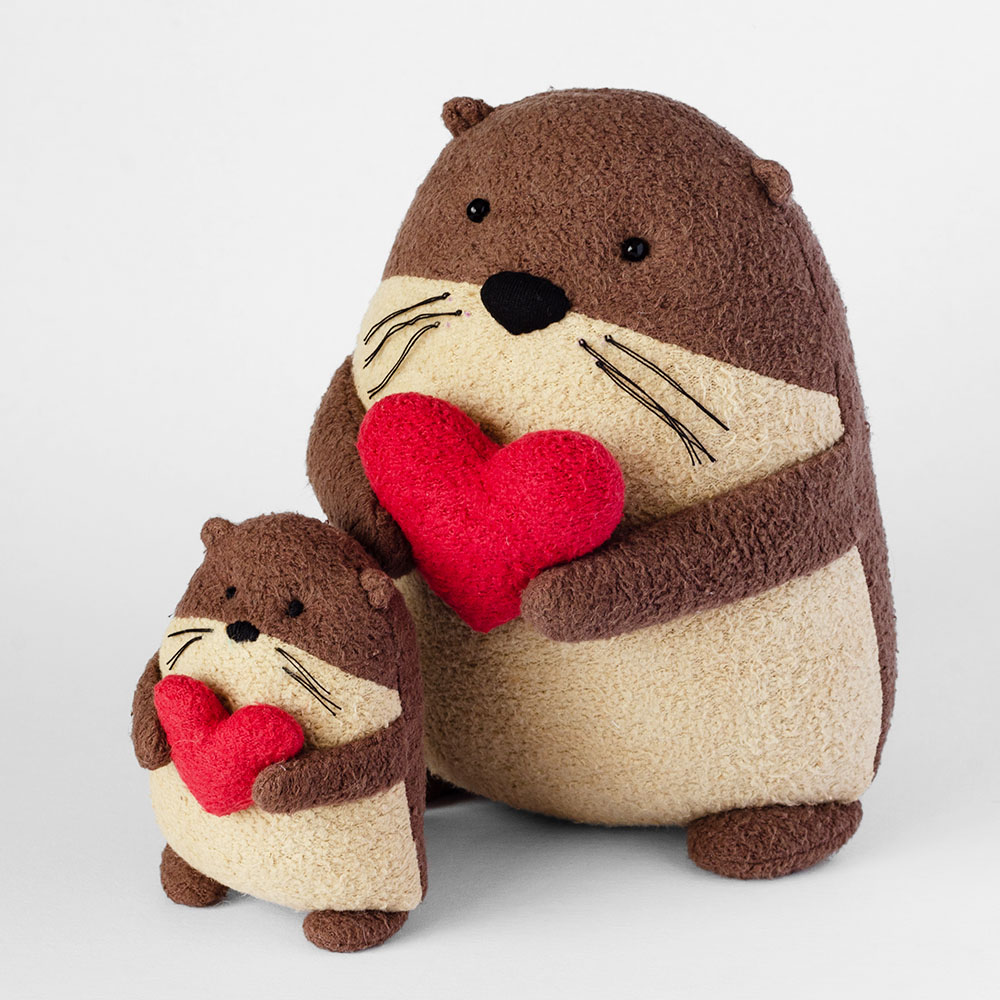
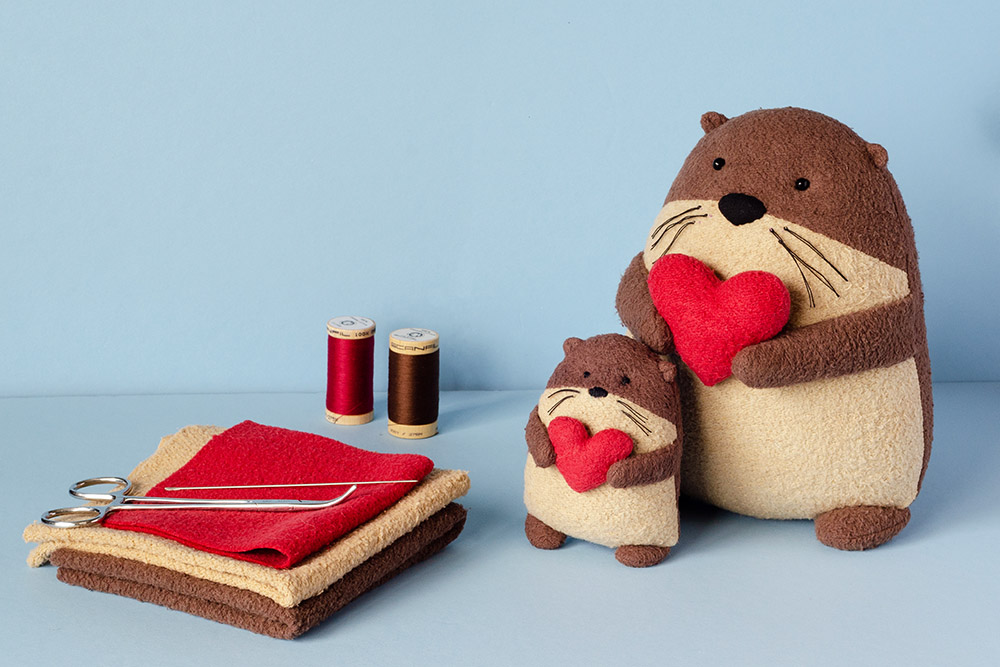
Squeakers the Otter comes in two sizes and can be sewn by hand or on the machine. Both are made using the same steps with a few minor exceptions, which are explained below in the tutorial. I made both a 60-second preview and a full length 90-minute video tutorial. In the full length video tutorial, I show each step for sewing the tiny otter, either by hand or on the machine.
60-Second Preview Video
90-Minute Video Tutorial
Materials
To make a full-size otter you’ll need:
-
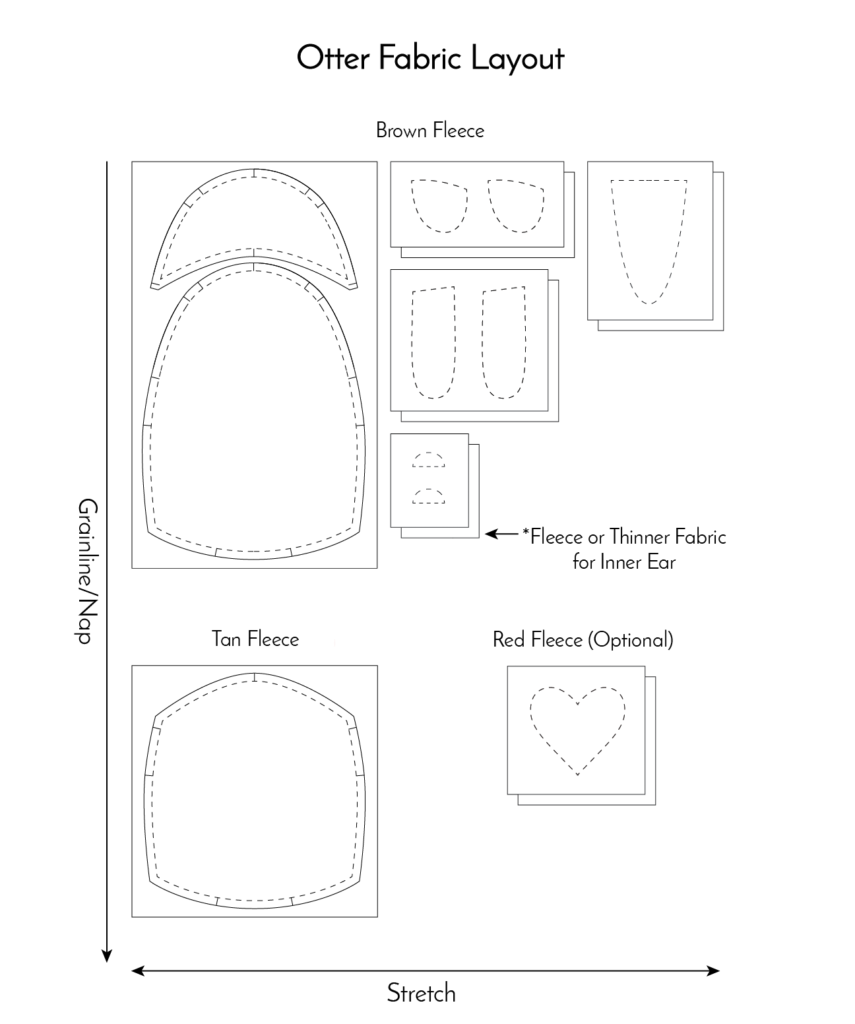
- Brown fleece (I’m using hand-dyed organic cotton and hemp fleece for which I have kits here) — you’ll need approximately 1/3 yard (see cutting layout below)
- Tan fleece — you’ll need approximately 1/4 yard
- A scrap piece of red fleece (if making a heart)
- Black embroidery floss OR Black felt for nose and eyes
- Stuffing (I’m using organic carded wool from a local farm, but I also like this organic roving
*. You can also use fiber stuffing, like this one made from recycled plastic bottles
*)
- Matching all-purpose thread (I carry organic thread in my Etsy shop)
- Marking tool (like this disappearing pen* or this water soluble pen*)
- Scissors
- Pins or clips*
- Tool for turning and stuffing (like these hemostat clamps*)
- Doll Needle
Links with an asterisk (*) are affiliate links. If you make a purchase through one of them, I get a small percentage of the sale with no extra cost to you.
If you sew your otter with natural fleece, I recommend using a 90/14 ball point needle; and if you sew with organic cotton thread, I recommend making your final stitch a stretch stitch (a stretch stitch is fairly permanent, so baste first when needed).
Printing the Patterns
Get access to the free pattern, as well as access to all my other free patterns, by clicking the button below.
Print pattern at 100%. (See a tutorial on printing and assembling patterns here.)
Sewing a Tiny Otter
The images below show how to sew the full-size version of the otter, and the video tutorial above shows how to sew the tiny otter. The tiny otter is made using the same instructions as the large otter with a few exceptions:
- Depending on the thickness of your fleece, you may need to use a scrap piece of a thinner fabric for the inner ears, so they will fold easily.
- Stitch the curves by hand, or at least baste by hand before stitching on the machine.
- Use embroidery for the eyes and nose.
Tracing the Pattern
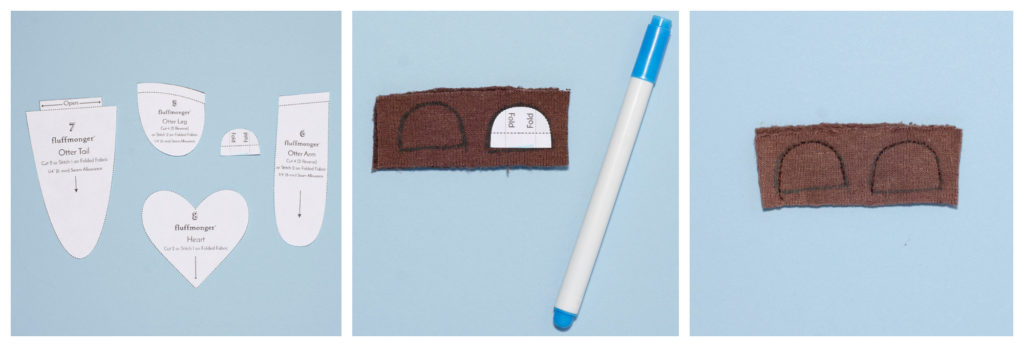
- Cut out pattern. I find it easiest to trace the stitch line for small pieces and sew on folded/layered fabric, so I’m using the arm, leg, ear, and tail pattern pieces with only the seam allowance at the very end (see first photo under ‘sewing the ears’).
- Line up arrows with grainline/nap direction of fabric. Trace ONLY the body pieces and transfer all markings. Detailed instructions for tracing the ears, arms, legs, tail, and heart will be provided in the steps below.
Sewing the Ears
The ears are the most difficult part of the tutorial. If you find that they are too tedious to sew, you can cut the ears out of felt instead, or you can leave them out all together. Remember that sewing soft toys should be fun! Feel free to modify your otter to make it easier, and don’t stress over making it perfect. If your ears are a little wonky, or the nose is crooked, it just adds character!
- Cut ear pattern piece so only the seam allowance at the very end remains.
- Trace stitch line of ears on folded/layered fabric.
- Stitch around ears.
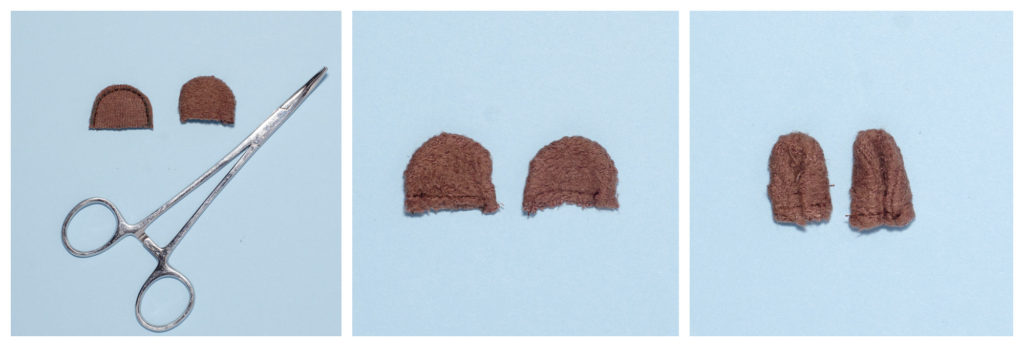
- Cut out ears with 1/8″ seam allowance (if you are new to sewing, using a thick fleece, or sewing a tiny otter, you may want to extend the seam allowance 1/4-inch to provide more fabric to hold when basting the ears.) Turn ears right side out and run hemostat clamps/turning tool around the seams.
- Press if needed. Baste stitch ears 1/8″ from bottom edge (if you added the half inch extra to the seam allowance, baste 3/8″ from the bottom edge).
- Fold outer edges of ears in toward the center at indicated markings. Baste stitch again to hold ears in folded position.
Sewing the Arms and Legs
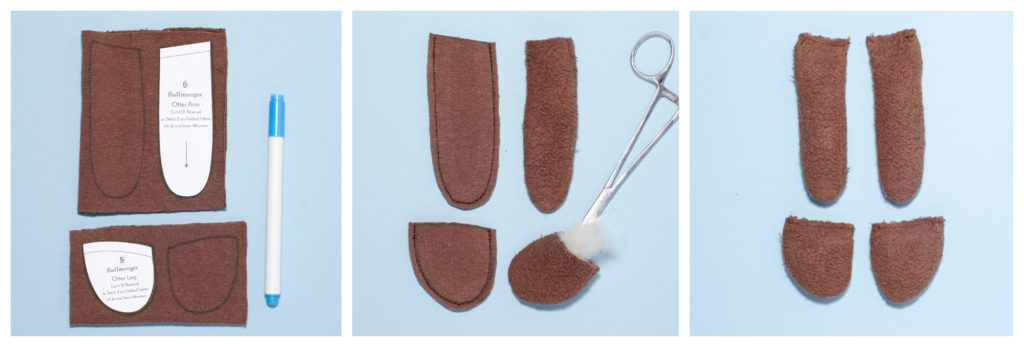
- Trace the stitch line for the arm and leg pattern pieces on folded/layered fabric.
- Stitch along traced line. Cut out arms and legs and turn right side out. Run hemostat clamps around the inside seams to help them fully open. Stuff arms and legs about 2/3 full.
- Baste leg and arm openings closed 1/8″ from edge.
Assembling the Body
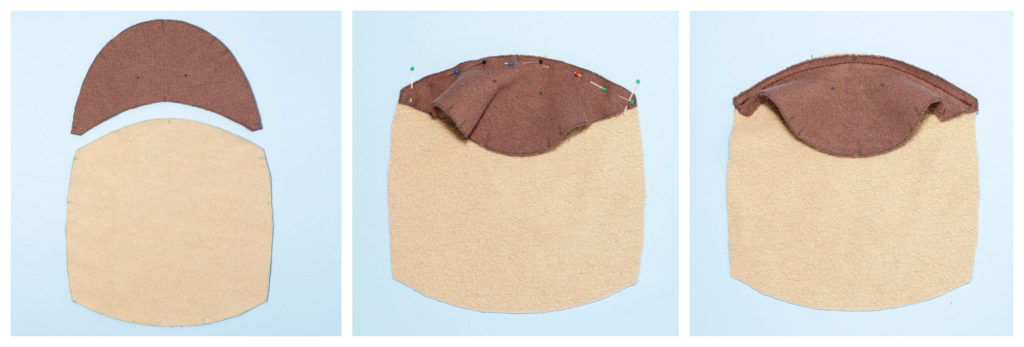
- Cut out otter belly and top of otter head.
- Pin pieces RIGHT sides together.
- Sew with 1/4″ seam allowance. If you are new to sewing curves, baste stitch before sewing the final stitch. (See a video on sewing curves here.)
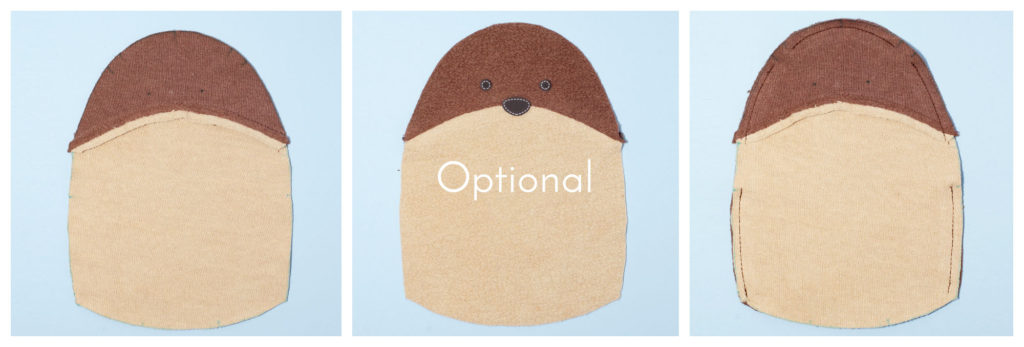
- Finger-press seam allowance open.
- At this point, you can make the eyes and nose, or you can wait until after stuffing (I like to wait until then end so I can needle sculpt the eyes). If making a tiny otter, you will only want to use embroidery for the eyes and nose. But for a full size otter, there are a few options for making the eyes and nose:
- You can make them with felt and machine or hand-stitch them 1/8″ from edge (as shown in the ‘optional’ image). If using the sewing machine to stitch in place, you will need to stitch them on before going any farther with the tutorial.
- You can use a satin stitch for the nose and make embroidered knot eyes with embroidery floss or yarn (here’s a video tutorial on embroidering eyes with a French or colonial knot). This can be done before or after stuffing depending on your preference. *This is the preferred option if making a tiny otter.*
- You can use glass eyes if your otter is not intended for a small child. (I have a tutorial here for using glass beads for eyes.)
- You can use a plastic safety nose and eyes. Note that safety eyes/noses are not intended for small children, and I do not recommend using them with natural-fiber fabrics, like organic fleece. (Safety eyes typically require a small amount of fusible stabilizer or Fray Check to prevent holes in stretch fabrics.) Inserting safety eyes/noses can be done at this point or right before turning the otter right-side-out.
- With RIGHT sides together, stitch otter front to otter back, making a U-shape with openings for ears and arms.
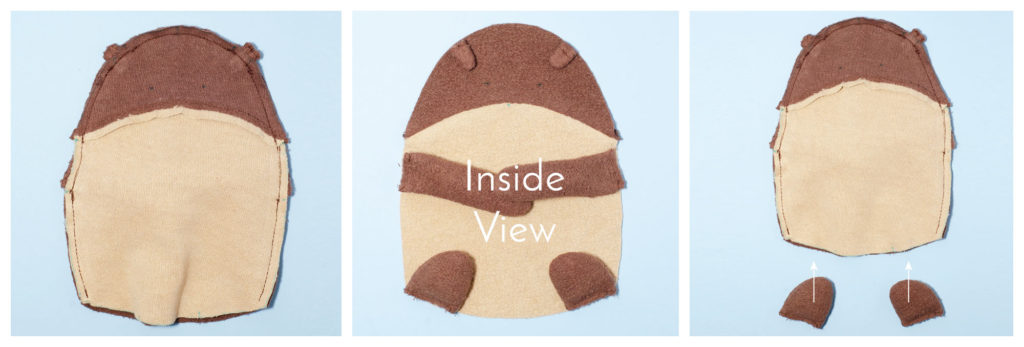
- Insert the ears and arms. Make sure the insides of the ears are touching the body side with the face (see ‘inside view’). Since the ears are tiny, I recommend baste stitching them in place and turning the otter right side out to check their position before making your final stitching.
- Insert the legs in position shown in “inside view.”
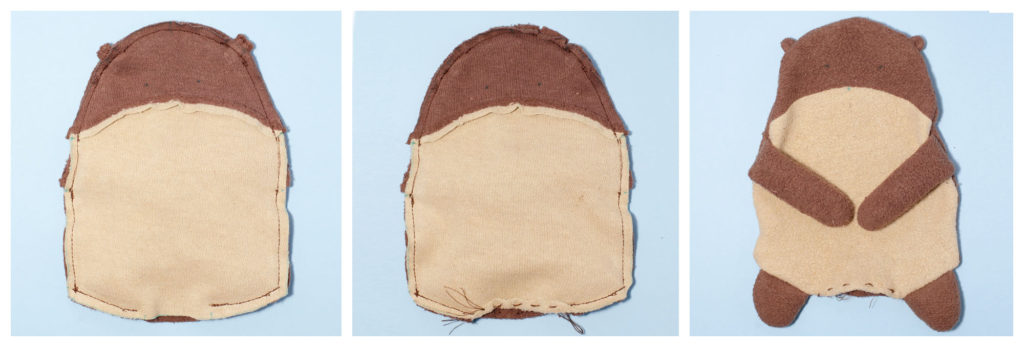
- Stitch legs into place, leaving an opening for turning.
- Baste the seam allowance around the opening. Clip curves and corners.
- Turn otter right side out (if you haven’t made your eyes or nose yet, make sure you have their positions marked on the right side of the fabric before stuffing).
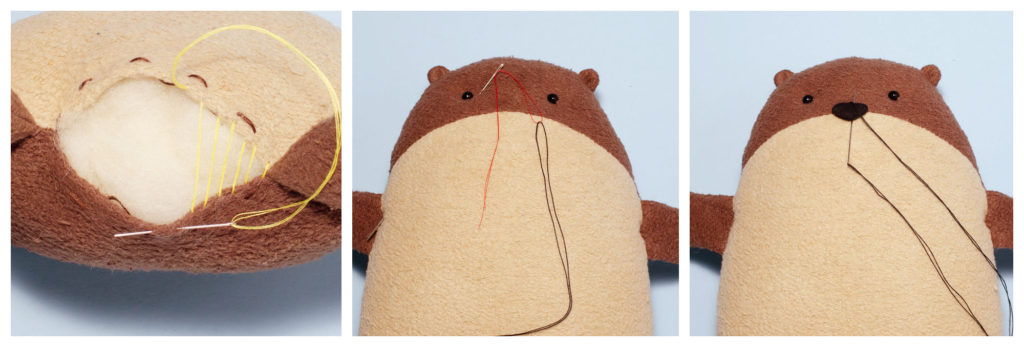
- Stuff the body firmly. Be sure to stuff the corners above the legs well, and continue stuffing as you close with a ladder stitch (you’ll want to use brown thread, but I used yellow to differentiate from the brown basting along the opening). Here’s a video tutorial on how to ladder stitch. Remove baste stitches after closing the opening.
- If you haven’t already, make the eyes and nose. If you’d like to needle sculpt your eyes, here’s a video tutorial. And here is a tutorial for using glass beads for eyes.
The Tail
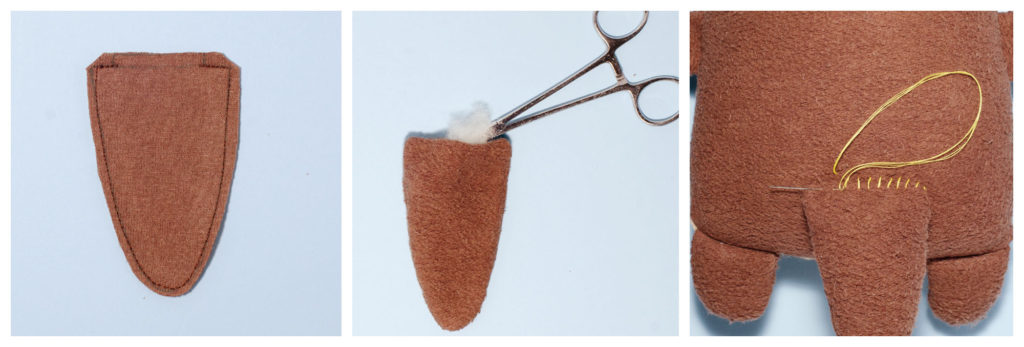
- Stitch around tail, leaving an opening for turning, and cut out.
- Flip tail right side out. Stuff gently and close the opening with a ladder stitch.
- Ladder stitch tail to indicated area on back. Secure a knot and bury the thread tails. (Here’s a video on attaching parts with a ladder stitch.)
Attaching Heart
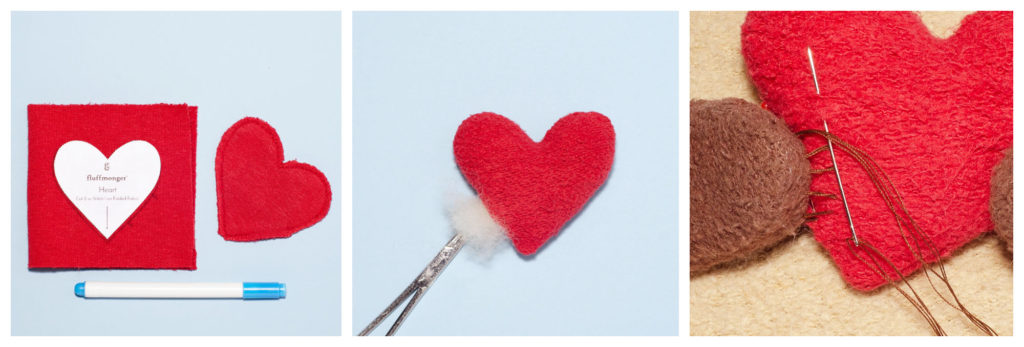
- Trace heart on folded/layered fabric and stitch around heart, leaving indicated opening for turning.
- Flip right side out, stuff, and close with a ladder stitch.
- Attach heart to otter’s paws using a ladder stitch.
Making the Whiskers
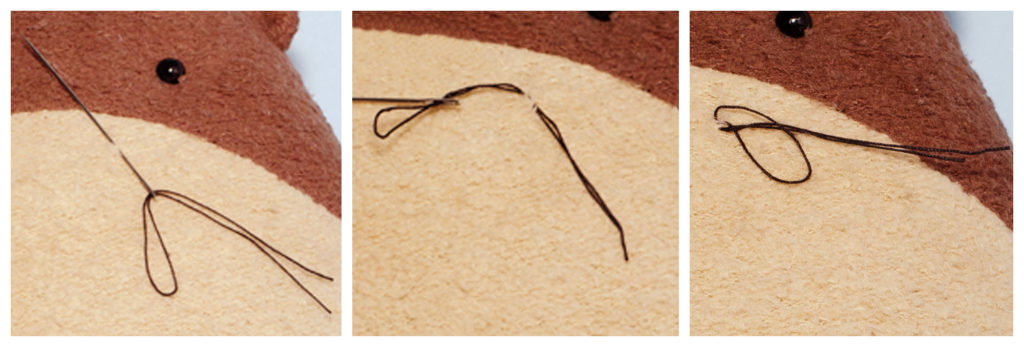
For the whiskers, you can use all-purpose or upholstery thread, or you can use a single strand of embroidery floss. There are a number of ways to attach whiskers, but this is the method that works best for me:
- Take a strand of thread 8-10″ long and fold it in half. Thread folded end through the eye of a needle (do NOT tie a knot). Insert needle into one of the whisker points, grab a few threads from the fabric, and bring the needle out.
- Hold the thread tails and pull the needle until the looped end of the thread is pulled out of the fabric and the needle comes off.
- Put the two tails of the thread inside the looped end and pull taut to make a knot. Repeat for other whiskers and trim threads to desired length.
Organic Fabric Kits
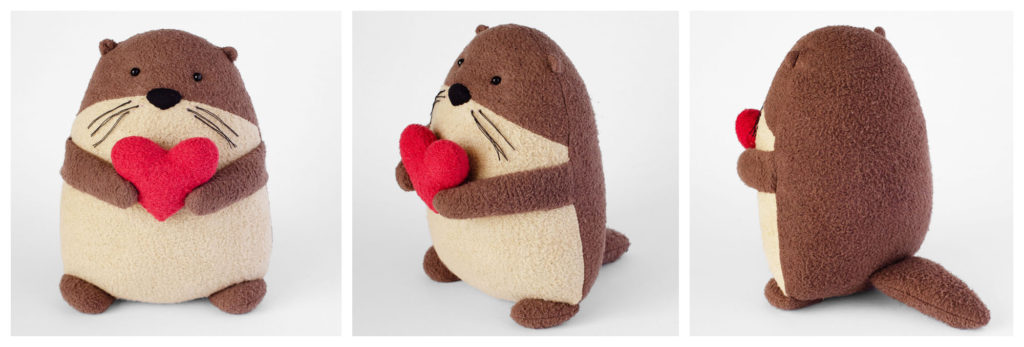
If you’d like to try sewing an otter with organic fabric, I have fabric kits available with just the right amount of hand-dyed organic fabric to complete the project.
Show Me Your Otters!
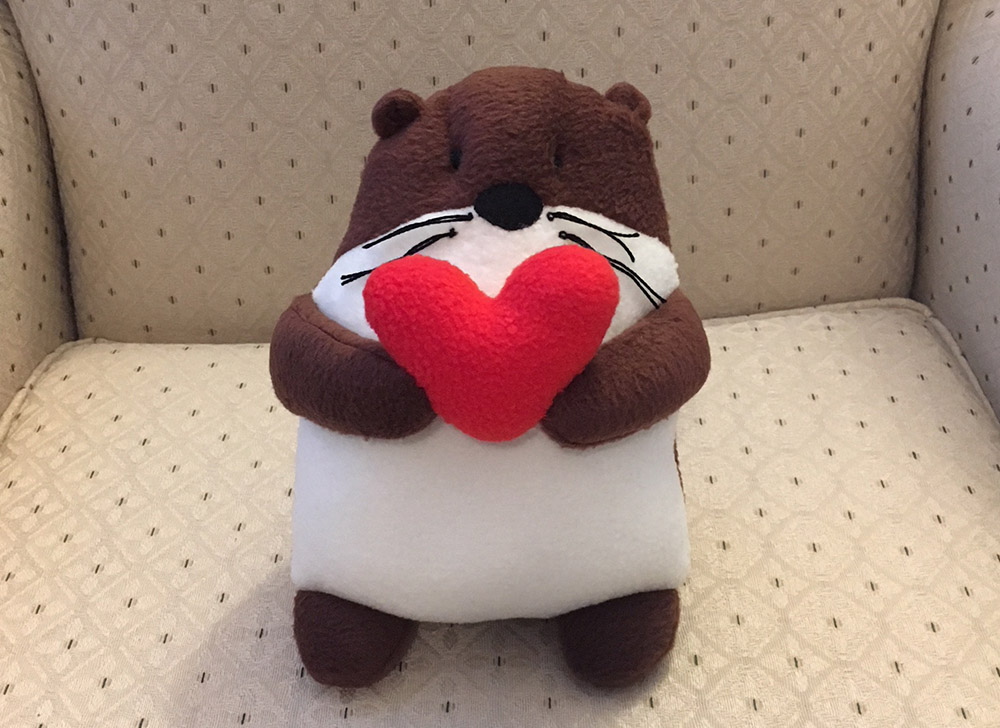
Veronica Stienburg made this little guy with polyester fleece!I’d love to see your otters! Post your photos in my Fluffmonger Patterns group on Facebook, and don’t forget to use #sewasoftie!
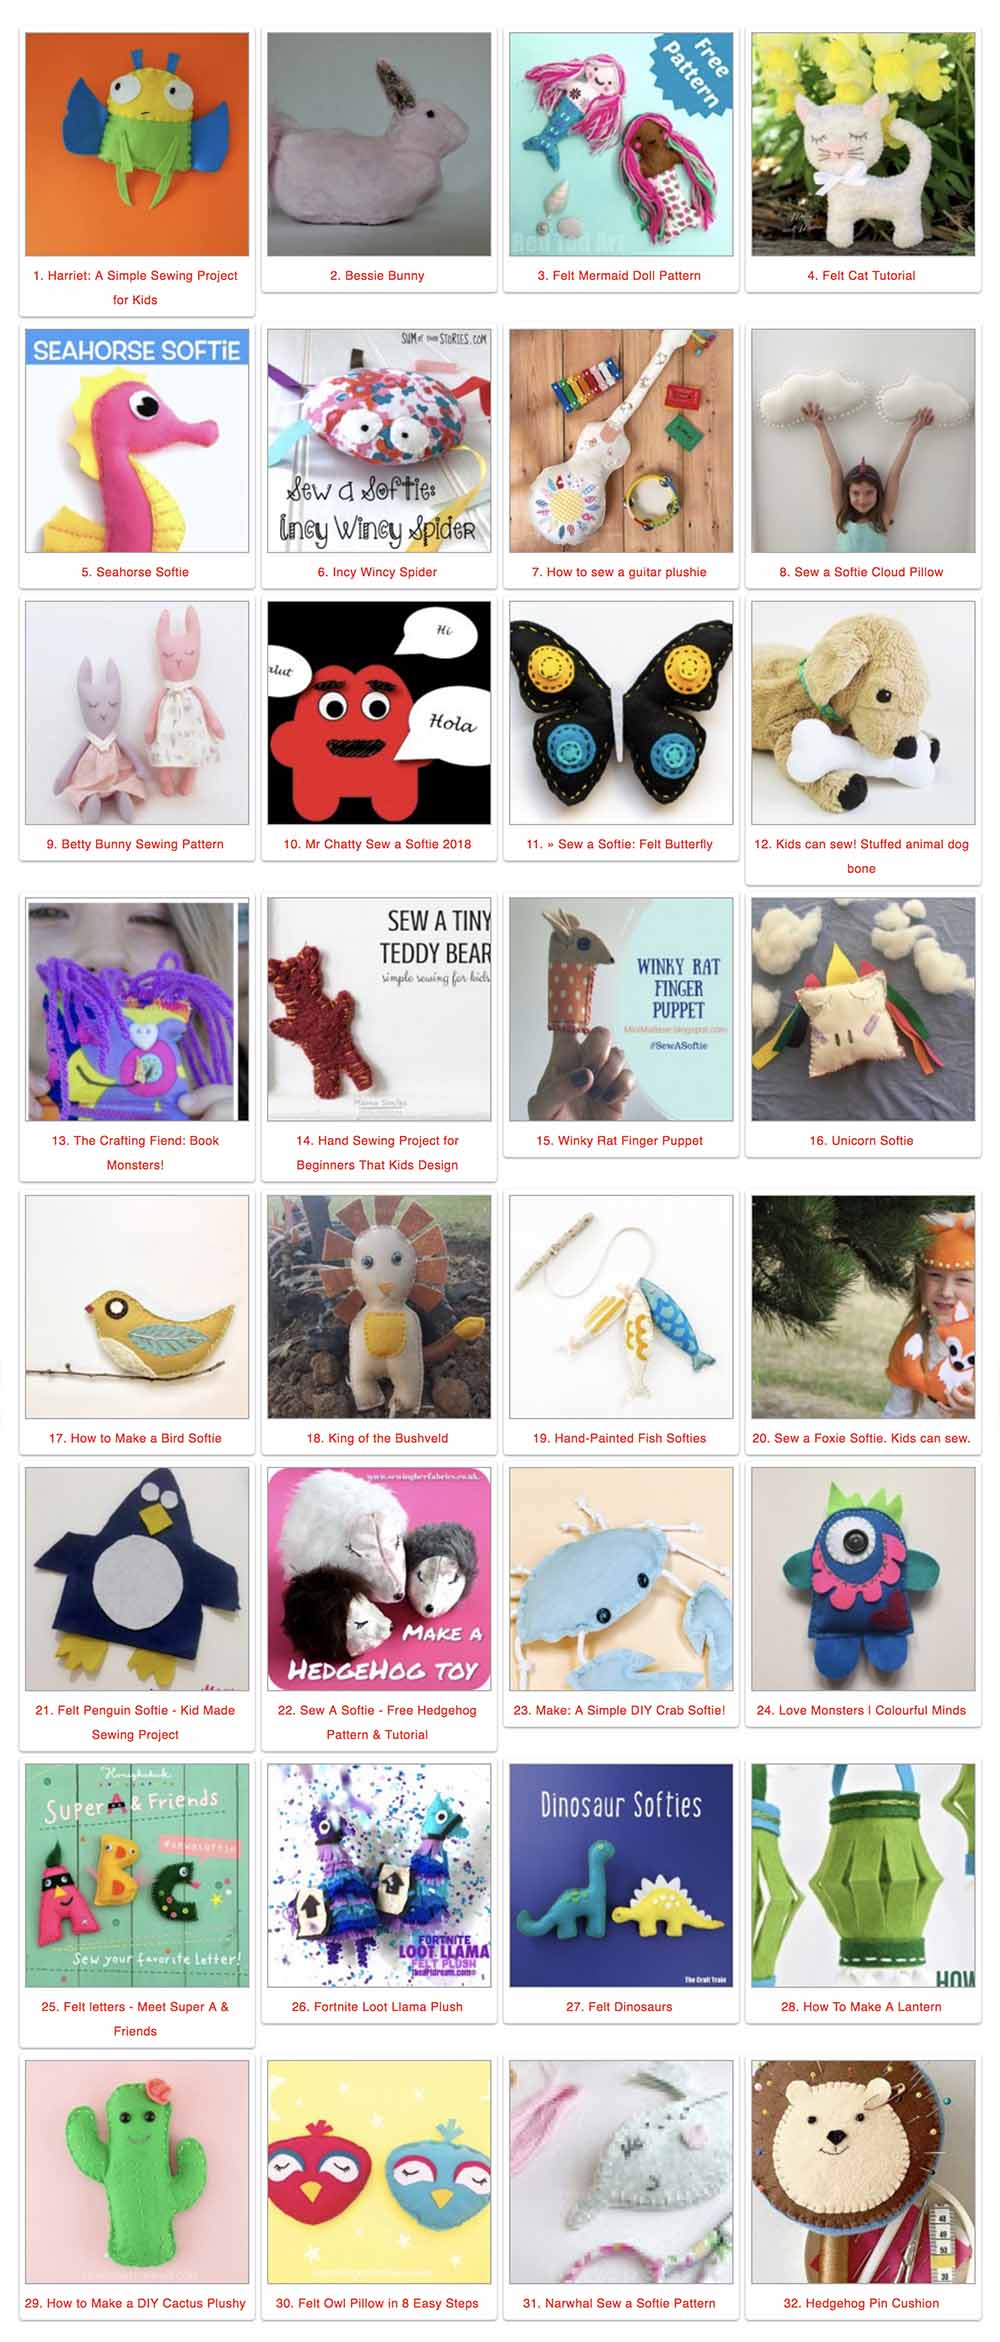
Check out the other 2018 Sew a Softie tutorials below!
Selling Items Made with this Pattern or Creating Derivative Works
This pattern may be used to create handmade toys to sell, but items may not be mass-produced. Please give credit to Fluffmonger with “pattern by Fluffmonger” and a link to my website, www.fluffmonger.com on your tags and listings.
If you modify the pattern or use certain pieces to create another pattern, still credit Fluffmonger, as these are considered derivative works.
This design is protected by federal copyright law (© 2018) and may not be reproduced in any form. Reproduction of this design, either in part or whole, or distribution of this pattern electronically or by hard copy is strictly prohibited.
22 comments
Leave a Reply Cancel reply
Archives
- March 2021
- February 2021
- April 2020
- January 2020
- November 2018
- July 2018
- April 2018
- March 2018
- February 2018
- January 2018
- December 2017
- November 2017
- October 2017
- March 2017
- February 2017
- November 2016
- October 2016
- September 2016
- August 2016
- July 2016
- June 2016
- March 2016
- February 2016
- January 2016
- December 2015
- November 2015
Calendar
| S | M | T | W | T | F | S |
|---|---|---|---|---|---|---|
| 1 | 2 | 3 | 4 | 5 | 6 | 7 |
| 8 | 9 | 10 | 11 | 12 | 13 | 14 |
| 15 | 16 | 17 | 18 | 19 | 20 | 21 |
| 22 | 23 | 24 | 25 | 26 | 27 | 28 |
| 29 | 30 | 31 | ||||



Otters are my FAVORITE! I want this pattern so much, but even though I signed up, I still can’t access it! Please help me!!!!
Hi,Debra! Thank you so much! The password should have been sent to you in an email newsletter. Be sure to check your spam and any promotions folders. There will be a link to the “free pattern library” in the email, and you’ll just enter the password that is listed below that link after you click the link. Be sure to type the password in all capital letters. Let me know if you can’t find the email.
Muchas gracias!!! Por compartir algunos patrones y me encanto los materiales que vendes tengo muchos sobrinos pequeños y quería preguntar si son son hipoalergénicos ya que en la familia padecemos de muchas alergias
Estoy usando Google translate, por lo que me disculpo si algo de esto no tiene sentido. El vellón y el hilo en mi tienda Etsy son orgánicos, lo que significa que las fibras de las plantas se cultivan sin el uso de pesticidas utilizados para la agricultura convencional, y se tiñen con colorantes GOTS (Global Organic Textile Standard). Sin embargo, es posible que las personas tengan alergias al algodón. Si sus sobrinos tienen alergias al algodón, es posible que desee averiguar si también tienen problemas con el algodón orgánico antes de comprar un kit.
can’t find the password. Like the otter pattern.
Thanks! Did you check our spam folders? It may also be in your “updates” or “promotions” folder.
I loved your blog. I’m from Brazil and I love to sew even though I have little time. I love making toys and dolls. Thank you so much for your shares.
Thank you so much, Fabiola!
Is the fleece you use stretchy, or is there stuffed animal fleece that isn’t stretchy?